This post may contain affiliate links. Please see disclosure form more information.
Diy twine covered Easter eggs are easy to make and add a fun rustic touch to your Easter and Spring decor. Grab some cheap plastic eggs from the Dollar Store or reuse old eggs that you already have, and you’re good to go!

Easter is early this year, and it’s already warm here, so I’m definitely thinking about spring. I don’t do much decorating after Christmas is over, but once spring rolls around, I get the urge to nest again. Actually, I don’t go all out, but I do like do add a few pops of color here and there. And, spring crafts are always fun to make, especially if they don’t cost a lot and are pretty simple to put together.
And, these twine eggs definitely fall into both categories!
I first made these eggs last year and shared them at PinkWhen, so now I’m dusting them off again — literally — and adding some spring decor to the house.
How to Make DIY Twine Covered Easter Eggs
Supplies needed
- Plastic eggs ( you can get them from the Dollar Store or re-use the ones you may already have)
- Glue
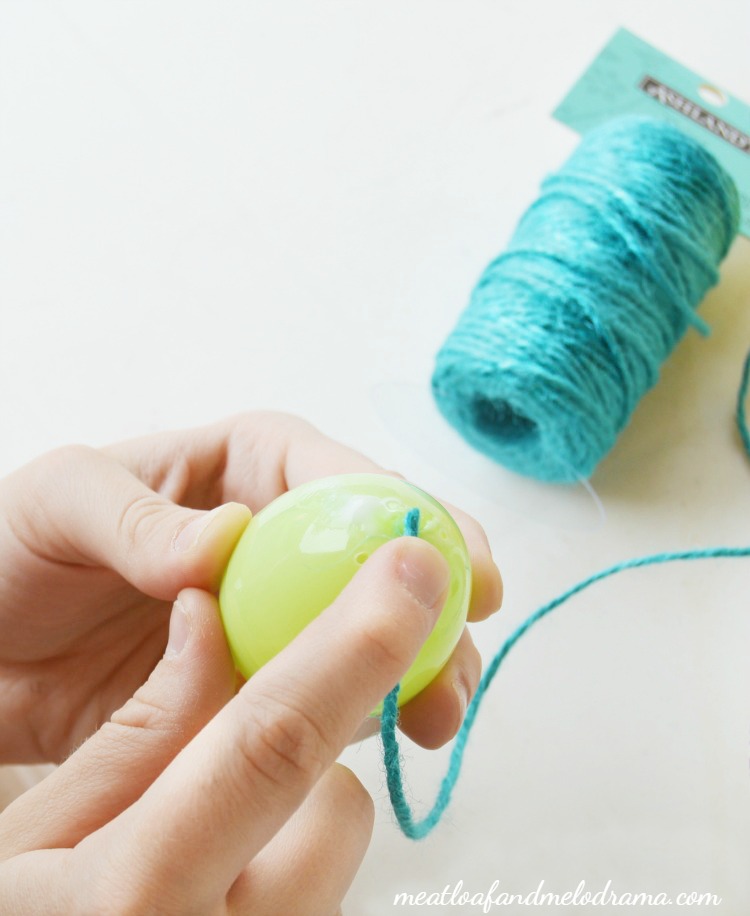
- Colored twine
- Burlap ribbon
- Scissors
- Wet paper towels for wiping hands
First, you dab a good amount of glue on one end of the egg. You have to use a thick glob so that the twine will stick, and this dries clear, so don’t worry about it showing. Then, press one end of the twine in the glue, and hold it until it begins to stick.
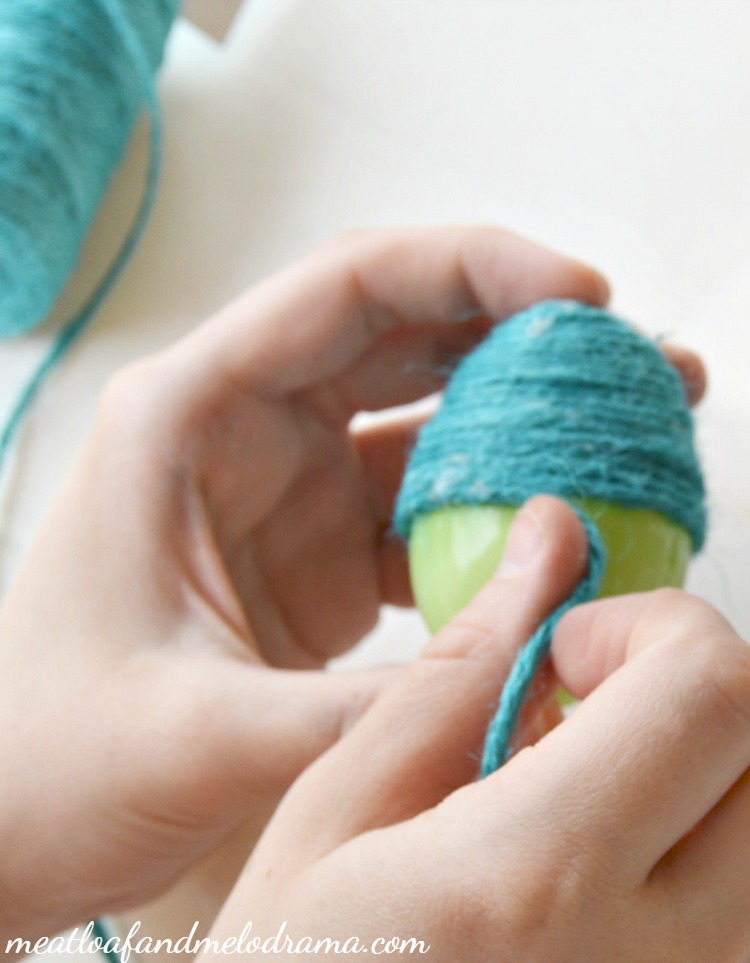
Then, you start winding the twine around in small, tight circles, adding more glue as you go along. Keep pressing the twine and let it stick to the egg before you move on. Once you start wrapping the twine around the egg, it gets a lot easier.
Make sure to wrap the twine strands as close together as you can, and push the twine up as you keep wrapping it around the egg.
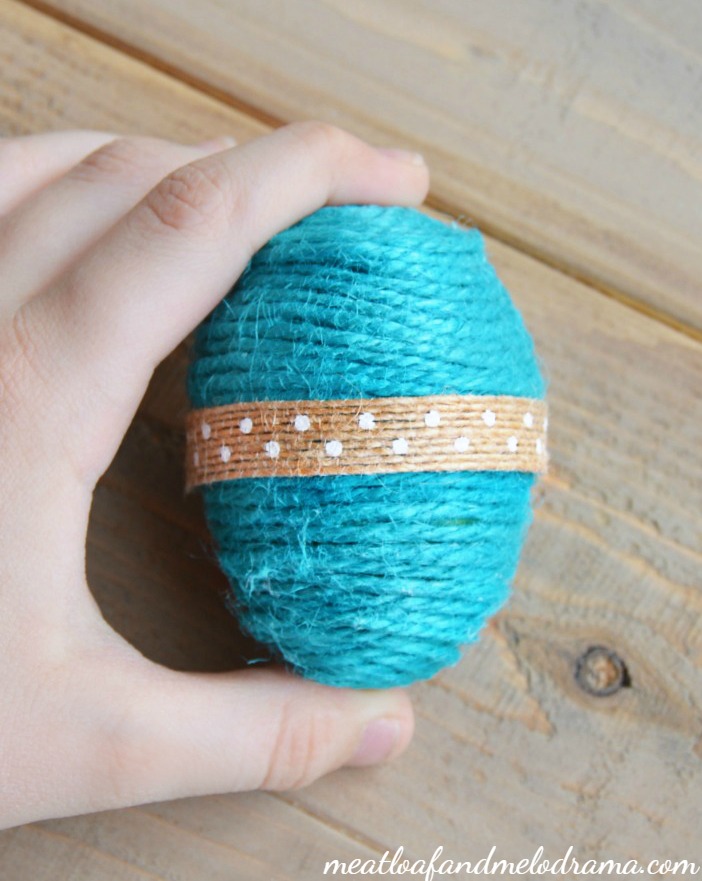
Once you get to the other end of the egg, wrap the twine in a tight circle again, cut the end, and glue it to the end of the egg. Once the glue dries, you can add a little burlap ribbon around the center, just for a little extra decoration.
When the eggs were all done, I set them into one of my grandmother’s old Desert Rose bowls, which I always take out and display around Easter.

And, that’s all there is to making DIY twine covered Easter eggs! This year, I might make a few more in different colors, but I’m crushing on all things aqua lately, so we’ll see.

This is also a fun craft to do with the kids, and it’s actually easier having a helping hand or two.
Happy Crafting!

Sharing at
The Scoop, Wow Us Wednesday, Weekend Retreat, TT&J, Thoughts of Home


How clever and creative!I have all the supplies on hand. Your post was truly a joy to read and I hope that you will continue adding your ray of sunshine every week on Thoughts of Home on Thursdays.
What a fabulous spring project.
I love the turquoise color.
Thank you for sharing this at Thoughts of Home on Thursday!
Thanks so much for dropping by, Laura! 🙂
This is really cute! I love the color and texture!
I just love this color right now, so I had to use it. Thank you so much! 🙂
These are darling! Great idea!
Thanks, Cristina. I think I need to make some more. 🙂
So cute, what a great idea!
If you can, you’re welcome to come and share this post over at the Really Crafty link party that is live right now!
I’d love to stop by! Thanks for the invite! 🙂
Terrific thing to get the grandkids involved in. They will have so much fun doing this. Thanks
My kids had a blast with this. Have fun with your grandkids! 🙂