• Skip to primary navigation
  • Skip to main content
  • Skip to primary sidebar
Meatloaf and Melodrama logo
  • Home
  • About
  • Collaborate
  • Recipes
  • Subscribe
  • Nav Social Menu

    • Bloglovin
    • Facebook
    • Instagram
    • Pinterest
    • RSS
    • Twitter
menu icon
go to homepage
  • Home
  • About
    • Collaborate
  • Recipes
  • Subscribe
    • Facebook
    • Instagram
    • Pinterest
    • Twitter
  • subscribe
    search icon
    Homepage link
    • Home
    • About
      • Collaborate
    • Recipes
    • Subscribe
    • Facebook
    • Instagram
    • Pinterest
    • Twitter
  • ×

    projects » Recipes

    DIY Lego Head Storage Container

    This post may contain affiliate links. Please see disclosure for more information. Published: Jan 16, 2015 · Modified: Mar 26, 2021 by Dee

    Hi Friends!

    My kids all love Legos -- even the girls. But my little man is completely addicted to them, and his collection is growing fast! He got a few new sets for Christmas, and he's already working on his birthday list, which of course, consists of more Legos! Our biggest problem is keeping the little bricks and mini figures from overtaking the house, and if you've ever stepped on one of these, you know it's not fun. So, I decided to work on getting these guys organized, and I made this cute DIY Lego head storage container from a plastic jar.

    lego head storage container made from plastic jar


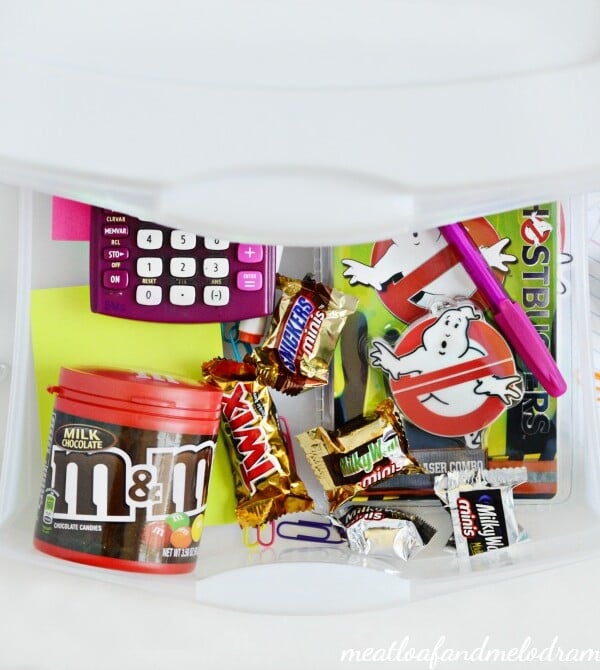
    There are a lot of ways to store Legos, but the problem is getting the kids to actually put the pieces away. I bought some of those little plastic containers with the Lego heads on them, thinking they would be good for keeping the figures separate from the bricks. But those aren't that big, and they aren't cheap. 

    So, I was looking at this large plastic jar, which formerly held snack mix, and it vaguely reminded me of a Lego head. I thought if I turned it into a storage container, the kids would want to use it for the little figures. But first, I had to remove the label. Usually, I can remove labels from jars by just using some Dawn, but this stinker was not budging! Finally, I used a mixture of peanut butter and baking soda, and voila -- it worked! 

    empty plastic jar of archer farms trail mix


    I gave the jar a couple of coats of yellow Rust-Oleum spray paint and let it dry. Turning the jars upside down before painting seems to work best for me, and you can see that even the box is now a pretty shade of yellow!

    spray paint jar with yellow rust-oleum paint


    I got out some of my son's Lego figures out to use as a guide, and I used paint pens to draw the face.

    large lego head storage container made with rust-oleum spray paint and large plastic jar

    The circles aren't completely even, but I think I came pretty close. Isn't he cute?!

    diy lego head storage box with lego mini figures and bricks

    So then, I had to explain to the kiddos that I wasn't playing with the Legos all day and I was actually working on something -- ha, ha. The kids think it's cute, and if they like it, I like it. Now I just have to stock up on snack mix and turn the empty jars into more Lego head storage containers -- fun!

    How are you conquering clutter this year? If you have any tips for storing toys, I'd love to hear them. Thanks a bunch for stopping by -- Have a super day!

    You might also like these similar posts


    lego earrings
    How to Make Lego Earrings

    snowman ornament made from lego bricks
    Make a Lego Snowman Ornament
    Pin
    Share
    Tweet
    Pin
    Share
    Tweet

    More

    • Make a Rustic Valentine Sign
    • Valentine's Hair Flowers
    • This Year's Christmas Decorations
    • Lego Earrings

    You May Also Like

    chocolate-peppermint-sugar-scrub-recipe
    Chocolate Peppermint Sugar Scrub
    easy-student-dorm-desk-organizer
    Easy Dorm Desk Organizer
    diy-summer-cork-coasters
    DIY Summer Cork Coasters

    Reader Interactions

    Comments

    1. Dee M says

      March 06, 2015 at 5:52 am

      They're so easy to make, and so much better than paying retail! 🙂

      Reply
    2. B. Lynn says

      March 06, 2015 at 2:56 am

      Great idea!!! It's fun and functional... My two favorite things combined:) And a whole lot cheaper than the $20ish ones I've seen in the stores.
      I just might have to make one of these for my little guy!
      Found this on Living Well Spending Less: Thrifty Thursday

      Reply
    « Older Comments

    Leave a Review Cancel reply

    Your email address will not be published. Required fields are marked *

    Recipe Rating


    Primary Sidebar

    I’m the blogger, chief cook, recipe developer and photographer behind Meatloaf and Melodrama. I absolutely love to create easy, budget-friendly, homemade meals and treats for my family. I also love to think of new ways to repurpose leftovers so that my family will actually eat them!

    More about me →

    Trending Recipes

    • Baked Breaded Pork Chops
    • Grandma's Potato Salad Recipe
    • Air Fryer Breakfast Sausage
    • Easy Microwave Baked Potato
    • Creamy Cucumber Salad with Sour Cream
    • Copycat Chick-fil-A Peach Milkshake
    • Grilled Corn on the Cob in Foil
    • Instant Pot BBQ Chicken

    Footer

    ↑ back to top

    About

    • All About Dee
    • Privacy Policy
    • Terms & Conditions

    Newsletter

    • Sign up for emails and updates

    Contact

    • Contact

    As Seen On

    as seen on buzzfeed delish country living forbes southern living

    Copyright © 2022 Meatloaf and Melodrama